No Products in the Cart

Detail Guide
Cleaning and preening is what the Mothers® Detail Guide is all about. From the simplest tasks to the most technically challenging, our Guide covers it all.
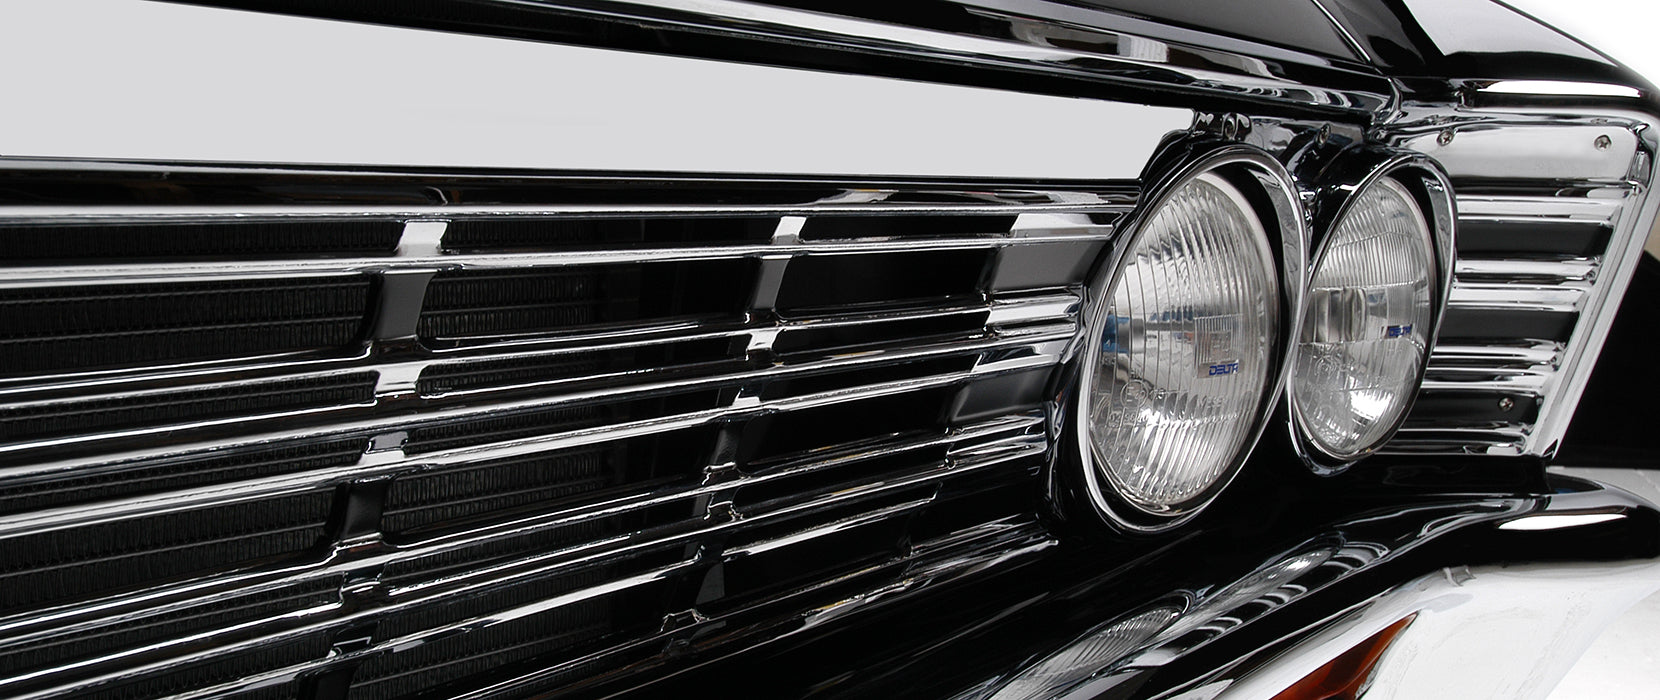
Exterior Plastics, Headlight & Trim Care
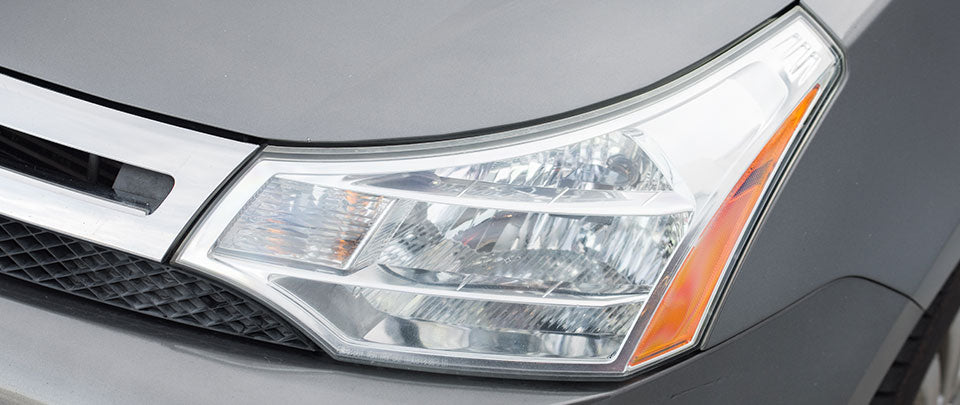
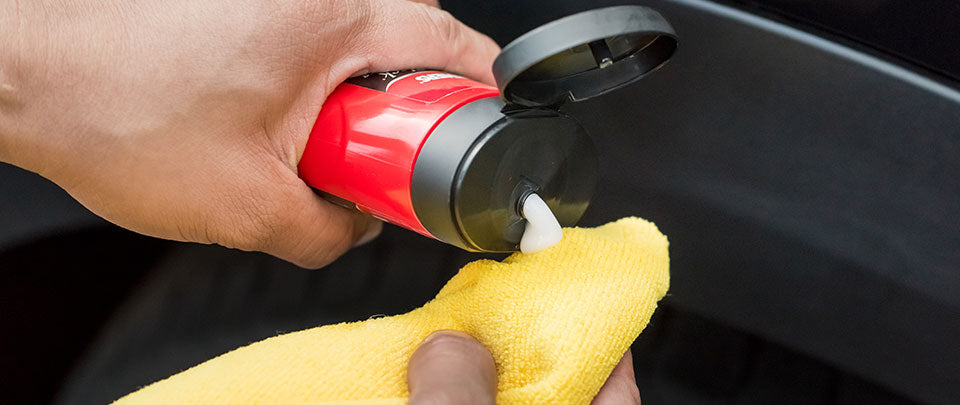
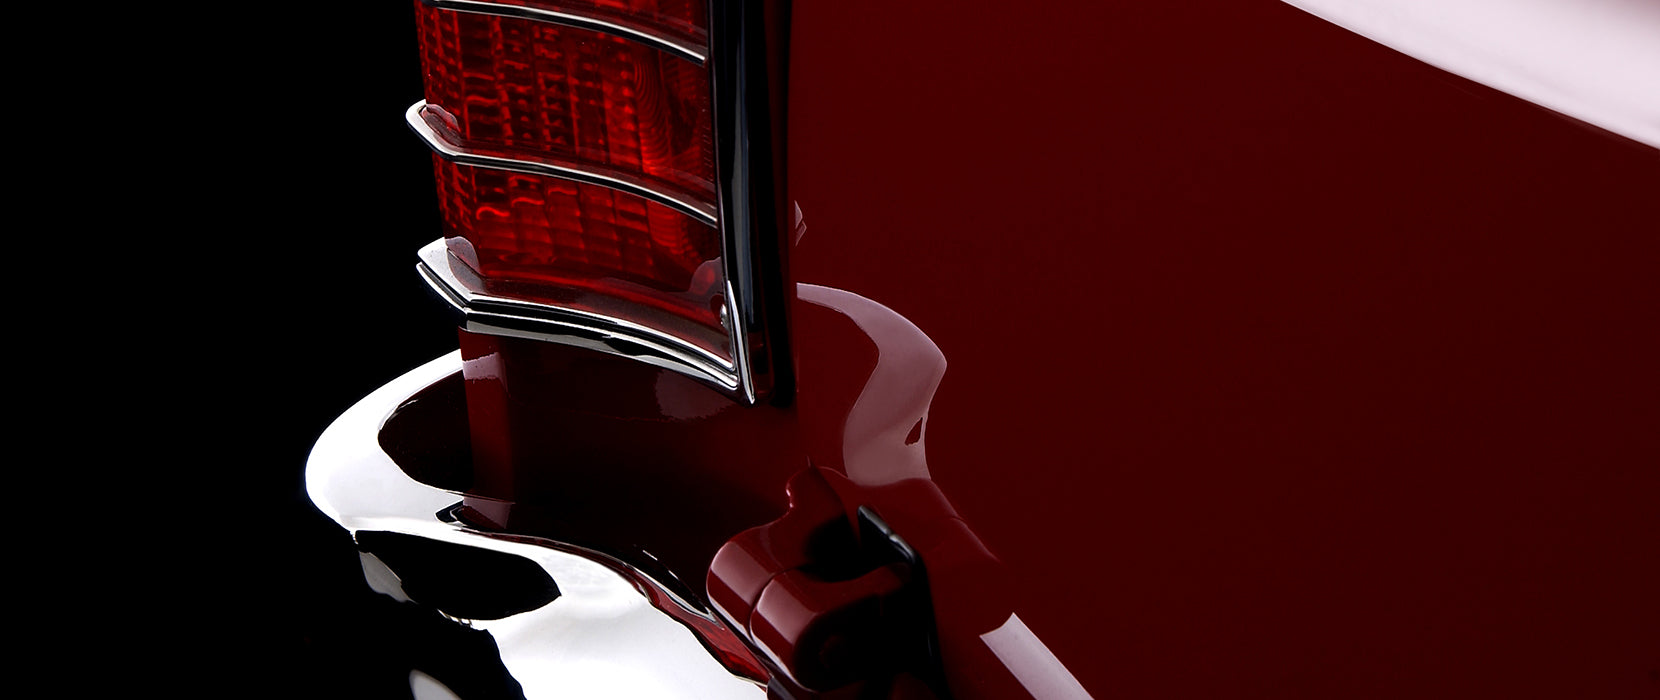
Working a plastic surface such as a headlight calls for the same action you’d employ when polishing paint, though on a smaller scale. Let the plastic polish dry, then follow it up by buffing out the residue – with a 100%-cotton or microfiber cloth. The basic function of a fine plastic polish like Mothers®’ is an analog of a cleaner wax’s effect on paint: light polishing media in the formula to smooth the surface, breaking down in the process, and leaving behind a protective coating. In the case of Mothers® Plastic Polish and PowerPlastic 4Lights®, the protective coating contains fine polymers that specifically guard against UV damage, oxidation and other environmental torment.
DETAIL TIP
It’s Plastic, So Be Gentle
Don’t make the mistake of slipping into the same force and finesse levels that you use for paint when working a plastic surface – there’s nothing beneath the plastic, whereas that paint sits on a body panel. Be gentle, pay attention to the progress of the polish, and remember that it’s plastic.
Some plastic surfaces – taillight lenses and automotive emblems come to mind – are intricate and require nonstandard polishing practices (polishing practice makes perfect). You can’t do wax-on/wax-off with a heavily sculpted taillight, for example, so work the polish into the highs and lows of the taillight design using a motion that parallels its features, folding a 100%-cotton or microfiber cloth as needed to reach the entire surface area. On a plastic-coated hood badge, trace the lines of the badge to get the edges, but rub circularly over the face of it as well to avoid creating trace marks that follow the edges. You want to preserve the character of these parts, so work patiently. Follow up your polishing with a soft detail brush, because the more character a part has, the more work it’ll require.
DETAIL TIP
Polishing Plastic Improves Longevity as Well as Appearance
For transparent or shiny items, Mothers® plastic polishes not only make ‘em pretty, they can help them last longer, both by removing the environmental infectication that degrades the surface and depositing a protective layer of polymers (polymers FTW!).
Headlight Restoration
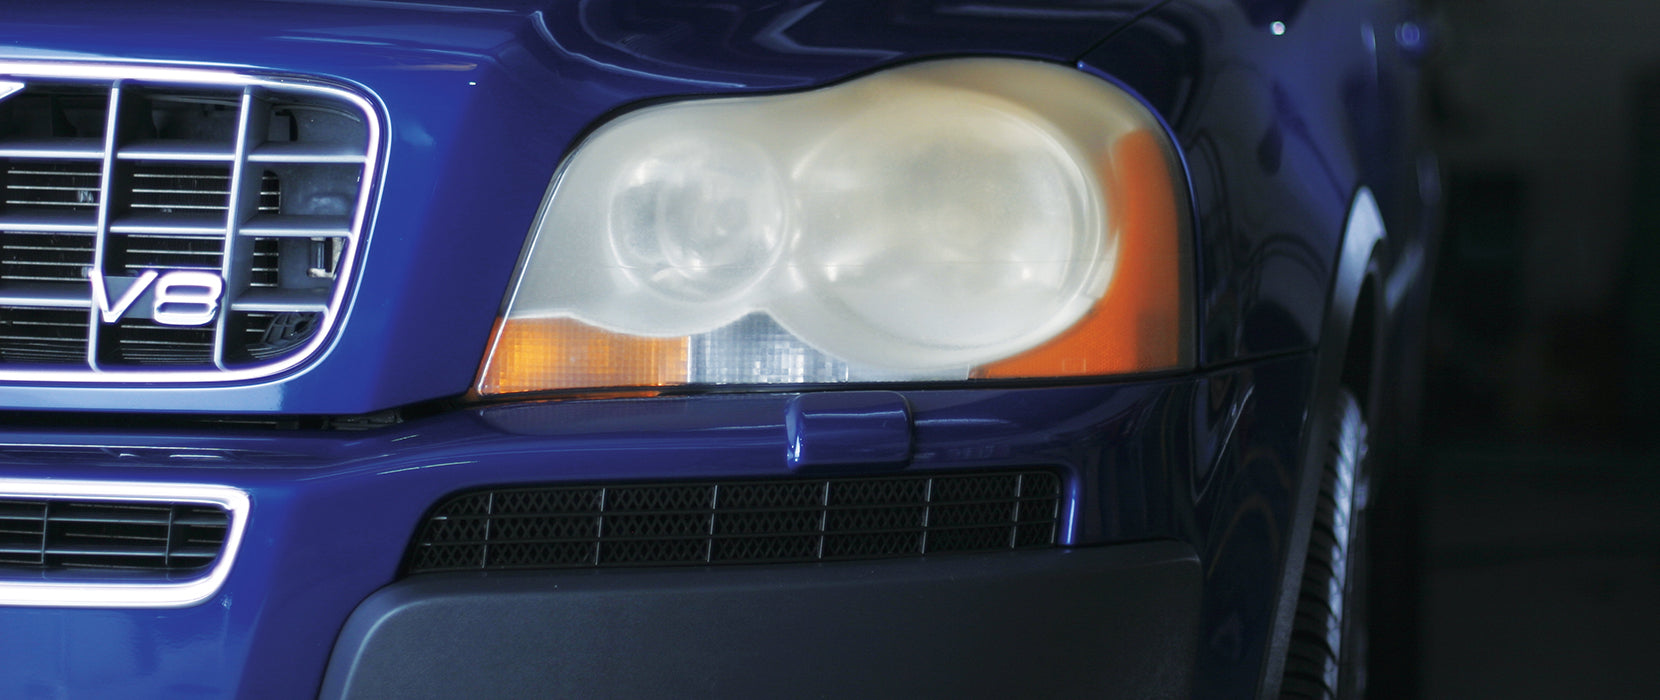
If your headlight discoloration is minimal, try applying Mothers® Plastic Polish or PowerPlastic 4Lights® by hand. Designed to clean, clarify and protect, these products will remove minor oxidation and surface scratches. Regrettably, not all headlights will respond in the same fashion. That’s because they take their fair share of on-the-road abuse. They’re damaged by heat – from inside and out. And they’re constantly pummeled by sand, rocks and debris. Life is not easy for a headlight.
NuLens® Headlight Renewal Kit – Drill-Powered Foam Buffing Awesomeness
On appropriate surfaces (headlights, taillights, bug shields, motorcycle windscreens) plastic polish can be applied by drill using PowerBall 4Lights® foam polishing tool. It’s part of our comprehensive NuLens® kit, which can handle a wide range of restoration situations. The kit includes:
- PowerBall 4Lights® Quick Change Foam Polishing Tool
- 3” Soft Flex Backing Plate
- PowerPlastic 4Lights® Plastic Polish
- 5 Quick Change “Severe Damage” Restoration Discs
Single-Step Restoration
In most cases, lenses can be safely repaired in minutes with a simple, single-step process. In addition to the steps outlines below, we’ve also produced a video to highlight the single-step restoration process. It’s available here on the Mothers® YouTube Channel.
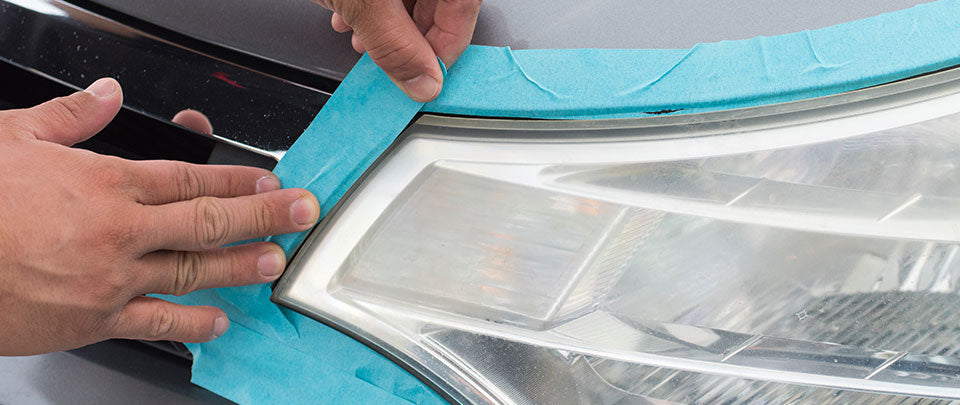
Start with a clean, dry surface. Mask-off the paint surrounding the headlight. Removable painter’s tape is preferred (you don’t want to use anything that is difficult and/or impossible to remove).
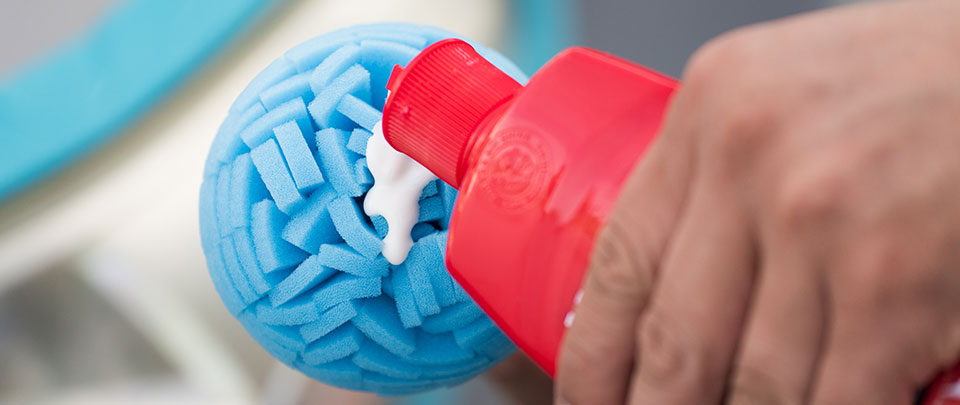
Attach the polishing tool to a cordless variable-speed drill. Apply the plastic polish to the center of the foam polishing tool. About a nickel-sized amount is ideal (remember, a little dab will always do ya).
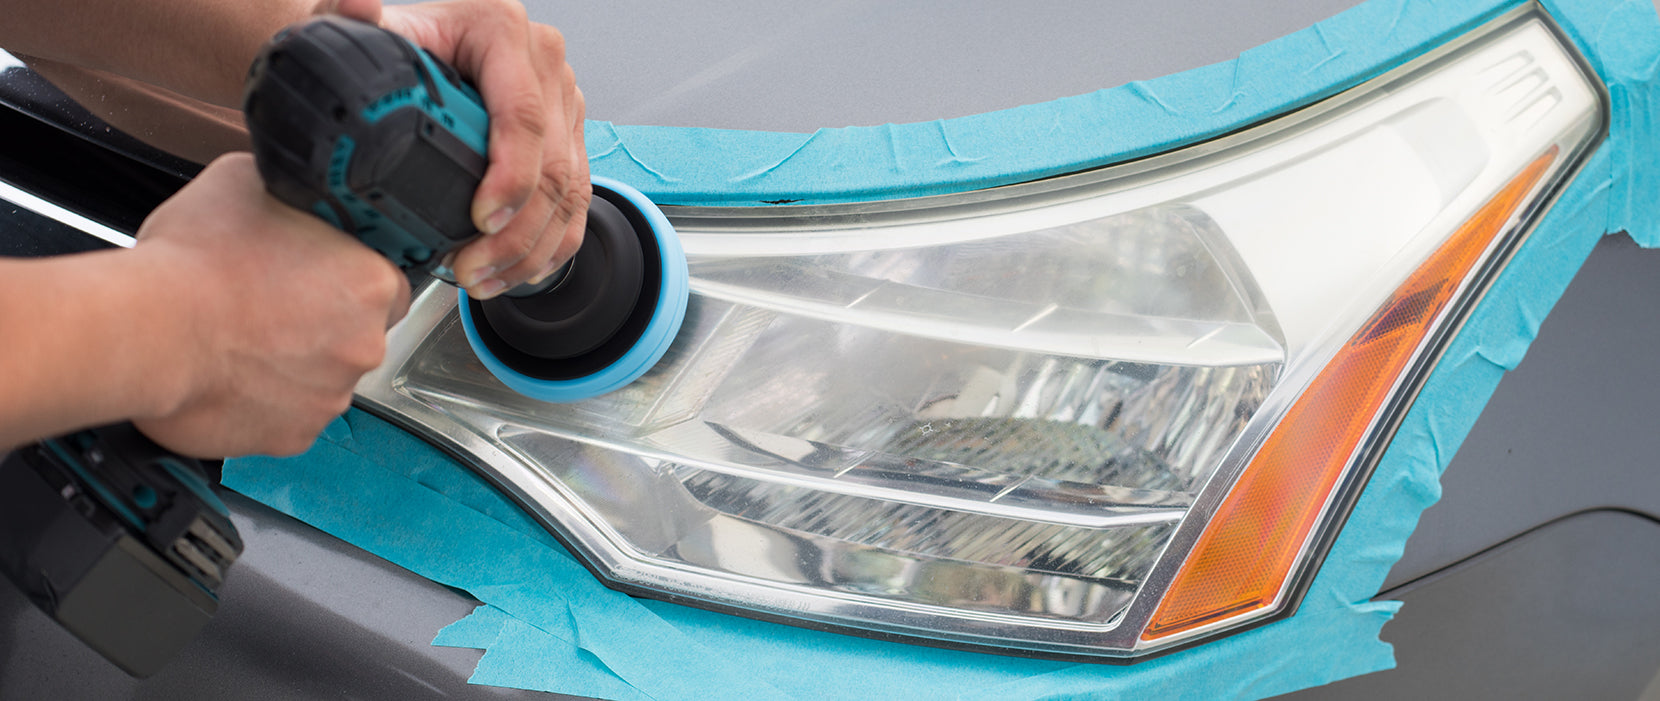
Place the top of the polishing tool on the lens, then start the drill slowly. Crank the RPMs up slowly, this helps avoid “slinging’ (a messy, often embarrassing problem). Using light to moderate pressure, work one area at a time, in overlapping motions. Add product when necessary. Polish the entire surface until lens is clean and clear. Buff surface clean with a dry microfiber or terry cloth towel.
Severe Damage Headlight Restoration
Some headlights need more than a single-step restoration. We refer to these headlights as “severely damaged.” You can bring back the clarity to this type of lens, but it will take a few additional steps. To determine if your headlights are in this category, start with a single-step polish. If the headlights are still unacceptably yellow, cloudy, scratched and/or pitted, then it’s time to move on to mechanical sanding. Though the process may seem daunting, it’s not difficult, thanks to the reusable backing plate and multi-stage Velcro-backed sanding discs included in our NuLens® kit. For more on this process give a watch here to our video on severe damage headlight restoration. One caveat though: this video depicts our previous generation, hand-sanding process. Though not specific to our newer, mechanical sanding discs, it is still extremely helpful in understanding the sanding and polishing process.
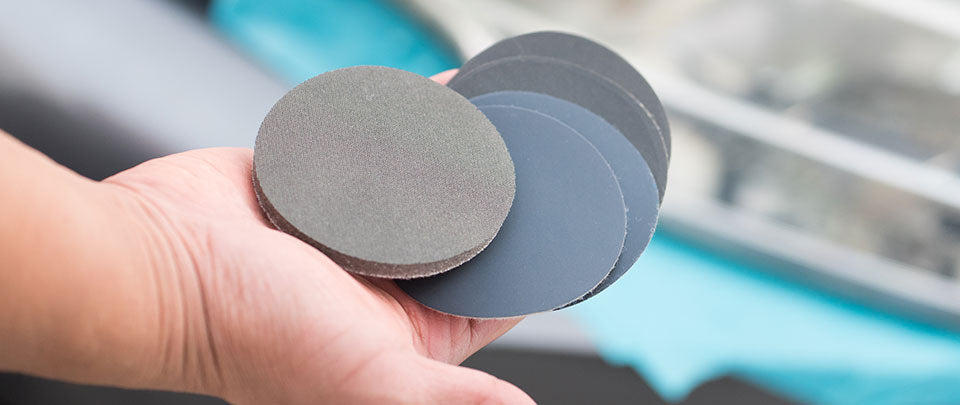
We will be working our way from course to fine sanding. Pre-soak the 500 & 800 grit pads in a cup of water, keeping them immersed until you’re ready to use them.
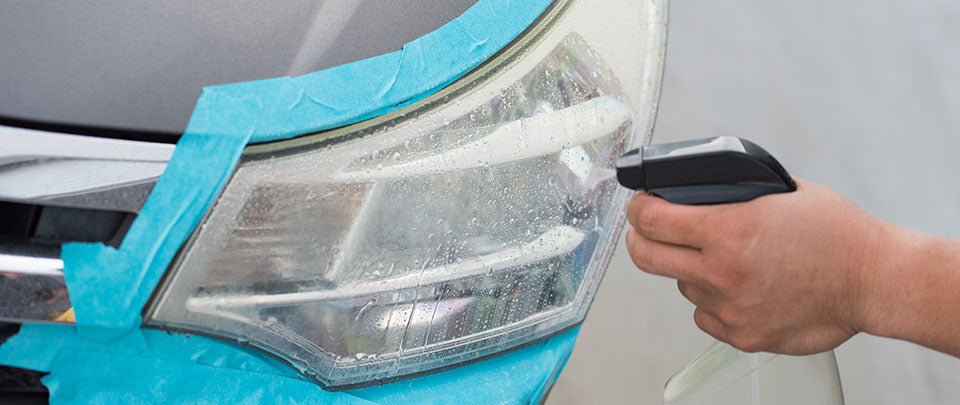
Start with a clean, foam-polished lens. Lubricate the surface with water – a spray bottle is the easiest way to maintain even coverage (not too mention an affordable way to cool off on a summer day). Keep the plastic wet throughout the sanding process. Secure the backing plate to the drill, then attach the 800 grit sanding pad to the plate. Hold the pad surface flat on the plastic, then start sanding. Keep the drill running at 400-600 rpm, using light pressure. Move evenly back and forth, in overlapping passes. When the lens has been completely sanded, stop, dry the surface, and inspect. Check to see if the lens is hazed (that’s a good thing – it means the disc is working). The surface should be white and evenly fogged. Minor imperfections and scratches should be gone. If the surface looks uneven, or there are still some flaws, re-wet the surface and repeat.

Follow the 800 grit pad with the finer 1500 grit pad. Use the same process as before, wetting the surface, polishing the entire lens, drying, then inspecting for irregularities. Repeat the process as needed.
Sanding with the 3000 grit pad is a bit different. This pad is designed to be used on a dry surface, so don’t wet the lens. A little extra speed is helpful as well, so run the drill at about 1300-1700 RPM. Again, when finished, inspect the surface. The lens should become clearer with each subsequent step. Repeat as needed (apparently, we can’t repeat this enough).
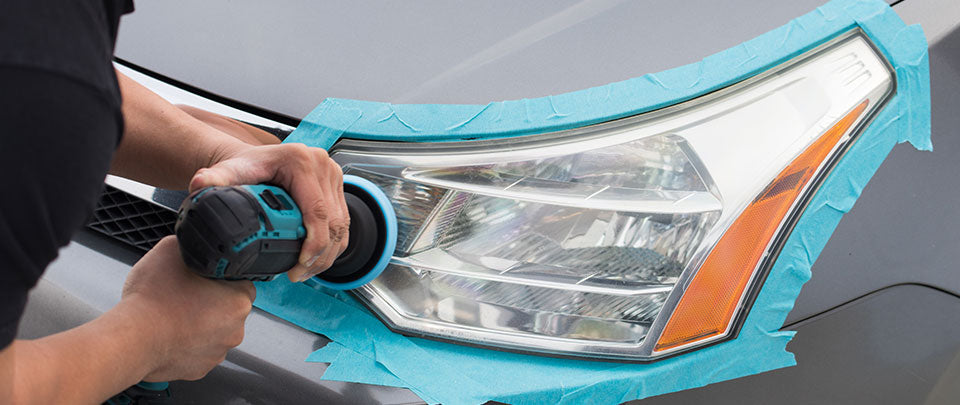
The final step is to polish the lens with a PowerBall 4Lights® foam tool and PowerPlastic 4Lights® Plastic Polish. Use the same process as described in the previous section – a nickel-sized dollop of polish, and smooth, even, overlapping passes. When you’re done, wipe away the polish, and marvel at your bright, clear, restored headlight (go ahead, we can wait while you marvel).
DETAIL TIP
When Good Headlights go Bad
Some headlights have damage on the inside of the lens. Typically, this is caused by water seeping through cracks, broken seals or other hidden paths. Moisture gets trapped inside, relegating your headlight to a never-ending cycle of heating, evaporation and condensation. Water spots, stains and yellowing can occur. But unlike damage on the outside of your lens, this type of degradation is not easily fixed. Many modern headlight units cannot be disassembled, which makes it nearly impossible to restore these surfaces. In this case, the only real solution is to replace the compromised unit (the throw-it-in-the-gutter-and-go-buy-another paradox).
Exterior Trim: Plastic and Rubber
More maligned than the front bumper, more abused than tires and wheels, more forgotten than automotive glass; this is the oft-forgotten story of exterior plastic and trim. Take heart; there are solutions close at hand. First, you need to understand what kind of plastic you’re working on, and its condition: what sort of polymer is it – rubber-based trim or hard plastic? Are you preserving and protecting, or restoring and repairing? Does it show a buildup of atmospheric grunge, or has the coloration and consistency of the plastic changed? Is the plastic and rubber in jeopardy of breaking down and falling apart, or are there just a few spots that need conditioning and care?
Regular Treatments Keep the Boogeyman Away
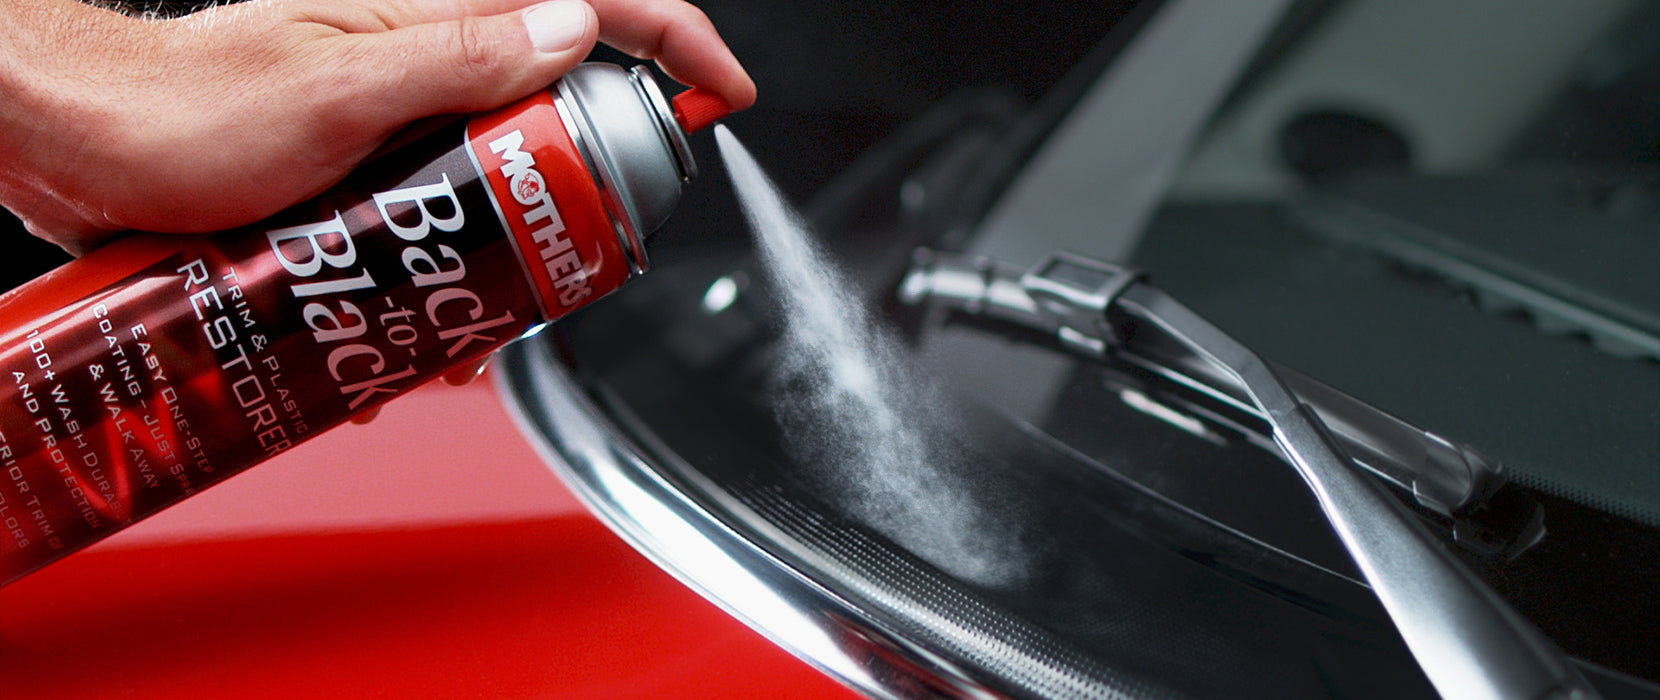
Smooth and textured plastic and vinyl trims can be easily maintained with regular applications of all-in-one products like Mothers® Back-to-Black® Trim & Plastic Restorer (liquid or aerosol). If your trim is in clean, like-new condition, consider using a dedicated dressing like Mothers® Protectant. It has more staying power than an all-in-one cleaner. The compromise? It doesn’t clean your trim. Whichever path you decide to take, regular applications of trim care products will improve the longevity of rubber and open-pore plastic trim parts, replenishing light chemicals that otherwise evaporate over time.
Though plastic has enjoyed greater use as an automotive exterior component, it’s not a perfect material that lasts forever (that would be a sweet, delicious Twinkie) – don’t buy the fallacy that plastics are indestructible (again, Twinkie – nom, nom, nom). Petroleum-based plastics hold up well with minimal cleaning and maintenance, but without it, they slowly wear out over time. Also, the sun degrades everything – you can’t dodge those UV rays if you drive the thing. Seek to keep it clean, while stemming the loss of essential petrochemicals in your plastics.

Heavy Duty Exterior Trim Cleaning
Restoring weathered plastic trim can be a challenge. Years of dirt, oxidation, and sun will take their toll. Accidental over-waxing of the trim can also leave it looking white and chalky. Scrubbing off the years of dirt and damage is a simple process; but it takes an aggressive, purpose-built product like Back-to-Black® Heavy Duty Trim Cleaner. And sometimes, one treatment is not enough.
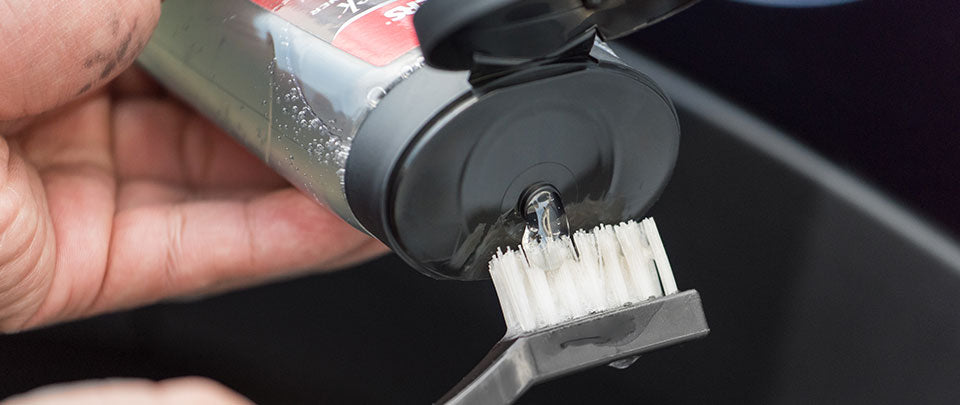
First make sure your trim is clean, cool, and free of any surface dust, dirt and debris. Then, apply the cleaner to a firm brush, like the one included with our Back-to-Black® Trim Cleaner Kit.
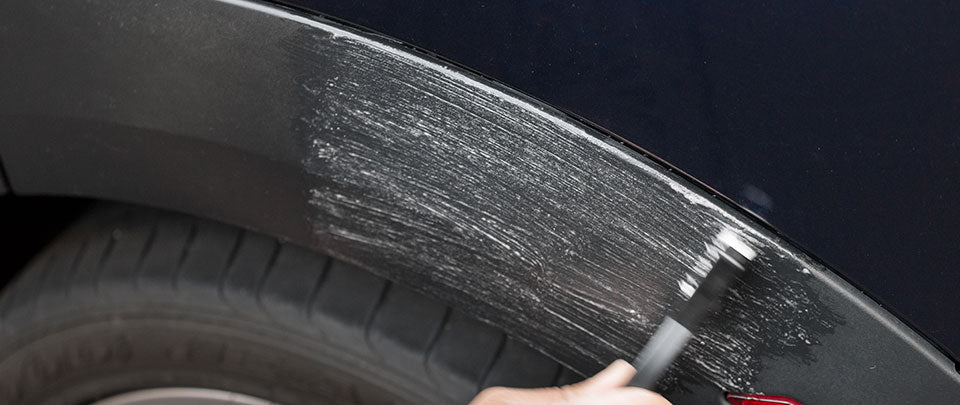
Using moderate pressure, brush the surface using an overlapping, back-and-forth motion. Be careful, don’t press down too hard. Let the bristles do the work.
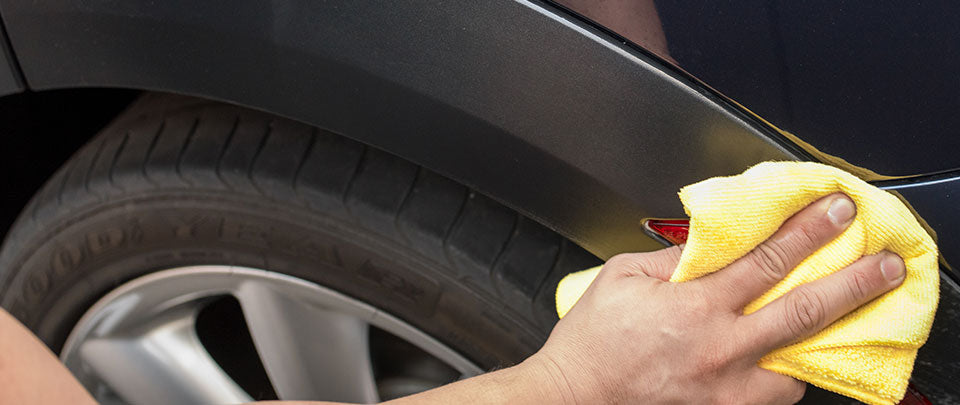
Wipe away any excess cleaner using a clean, soft terry cloth or microfiber towel. Inspect the surface. Does it look fresh, natural, restored? Is the over-wax gone? If the trim is not quite there, repeat the process (to repeat, please repeat the process). Once you’re done, consider applying a trim protectant. You want to keep that restored surface looking great for years to come.
Trim Maintenance and Protection
For trim that is not seriously neglected, mainstream maintenance products are your best choice. Mild and user-friendly, these formulas come in two flavors; all-in-one cleaners/protectants, and stand-alone dressings. With the all-one-products like liquid Back-to-Black® Trim & Plastic Restorer, you get the benefit of cleaning and protecting in one step. Purpose-built dressings like Mothers® Protectant do only one job (conceal and protect) – but they do it particularly well.
Using these products is simple. Apply the product to a clean applicator or microfiber towel.
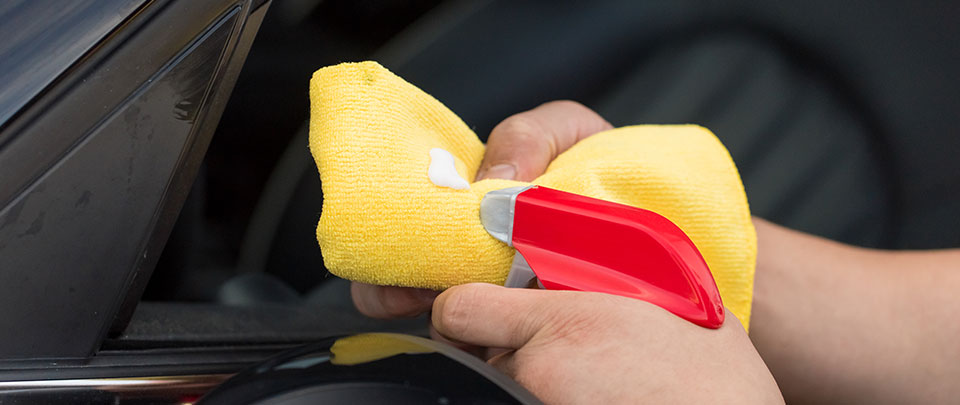
If you use a spray protectant, apply it directly to the applicator. This will allow you to better control where the protectant or restorative is used, even out the application, and help avoid super-saturated splotches.
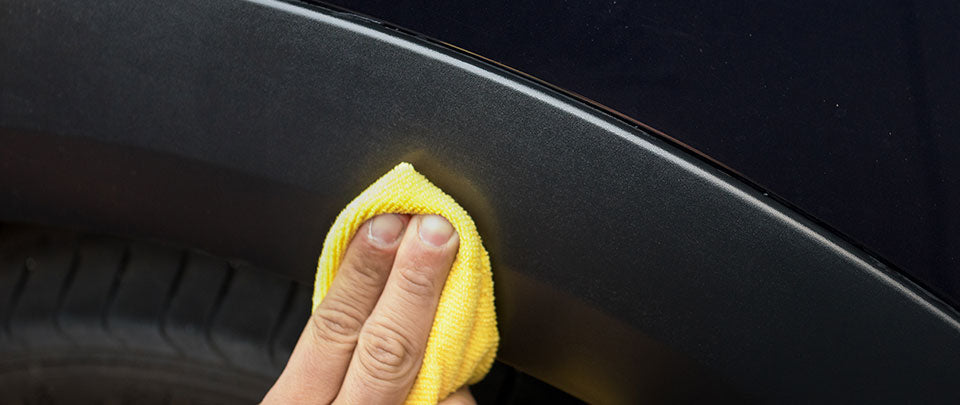
Massage the product into the plastic trim. Make sure the surface is cool and dry. Allow it to penetrate. Then buff excess off after use and check for evenness. If you see any faint streaks or blotches, a quick, even reapplication and removal should fix the issue.
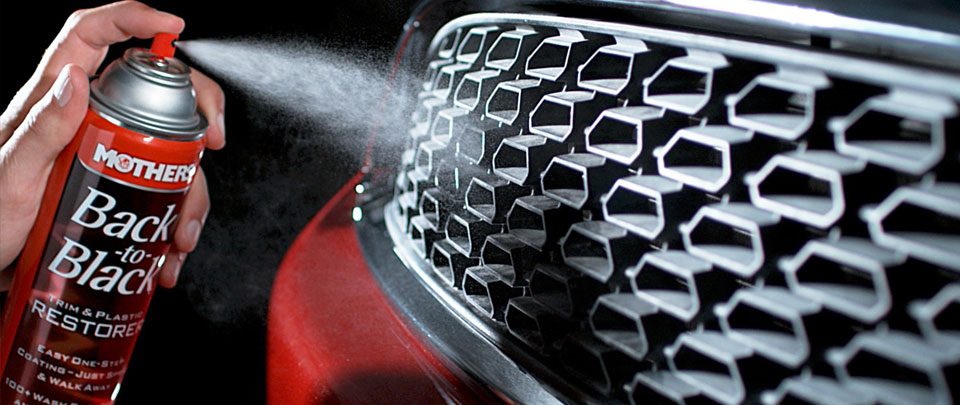
When dealing with large trim pieces like plastic windshield cowls, kick panels, truck bed liners and tonneau covers, spray-on products reign supreme. They’re also perfect for difficult-to-reach areas like egg-crate grills and fender wells. Aerosol Back-to-Black® Trim & Plastic Restorer and Mothers® Protectant both excel at these tasks. In the same way you’d treat a hand application, don’t forget to buff off any excess product from the plastic, to help eliminate streaks and splotches. You’ll also want to remove product overspray from surrounding surfaces, like paint and glass.
DETAIL TIP
A Cautionary Tail
Some surfaces should never be treated with these dressings. Step-up running boards, bumper step pads, side steps. As you can see, the commonality is “step.” Plastic dressings can be slippery, and you don’t want to risk falling off your lifted brodozer. Sure, you might think it’s worth the risk – that is until someone ends up in the ER, or in a fail compilation video.
The Other Plastic: Colored and Clear Lenses, and Transparent Plastics
Clear or colored plastic lenses, headlights, taillights, emblems, center caps, and transparent plastic windows will all benefit from a plastic polish treatment. Plastic with stains, scratches and yellowing will also look better – often as good as new, so long as the surface hasn’t deteriorated. Plastic treatments like Mothers® Plastic Polish and PowerPlastic 4Lights®, if used regularly, will keep that yellowing from ever making an appearance.
Preserving or Restoring Rubber Seals
Window seals live a sad, difficult life. Often ignored (and frequently crushed into submission), their purpose is truly function-over-form. But seals are extremely important. They keep the glass in and weather out. To make sure they remain in top condition, regular application of vinyl dressing is essential. For trim that is not seriously neglected, mainstream maintenance products are your best choice. Mild and user-friendly, stand-alone dressings like Mothers® Protectant are ideal for keeping the seals pliable, protected, and looking like new (gotta love that new seal smell).
Application is straightforward. Spray the protectant on a 100%-cotton or microfiber cloth (which will help you avoid overspray or goozing on too much), and wipe it into the rubber. Work on cool, dry surfaces. It doesn’t matter if you’re applying a product like Mothers® Protectant to rubber that’s not black, so long as it’s not painted or coated. Buff off excess preservative after giving it a minute to soak, and reapply to even out blotchy applications.
If a rubber part has faded, deteriorated or its surface shows the signs of environmental victimization (everything from bird fruit to smog poop), more powerful plastic and rubber restoratives like Mothers® Back-to-Black® Trim & Plastic Restorer can help improve its appearance, function, and return some life to it. If you apply thoroughly and allow it to soak, this restorative can bring lost luster back to most rubber, but it’s not overpowering – feel free to apply multiple coats if you’re not satisfied with the initial outcome.
In the case of rubber parts that have not only aged but accumulated the schmutz of extended exposure, specialized cleaners can erase years of grime (again, the color of the part doesn’t matter so long as it is not coated or painted). Mothers® manufactures Back-to-Black® Heavy Duty Trim Cleaner for this – be sure to chase it with a rubber preservative like Mothers® Protectant, or Back-to-Black® Trim Restorer.
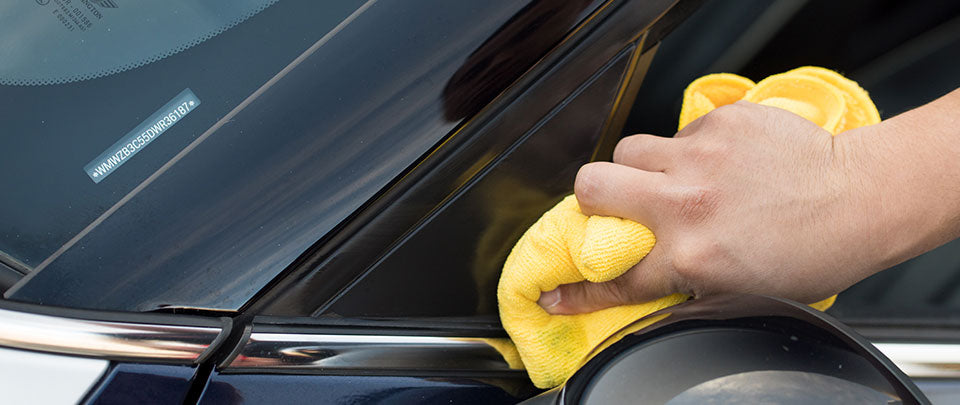
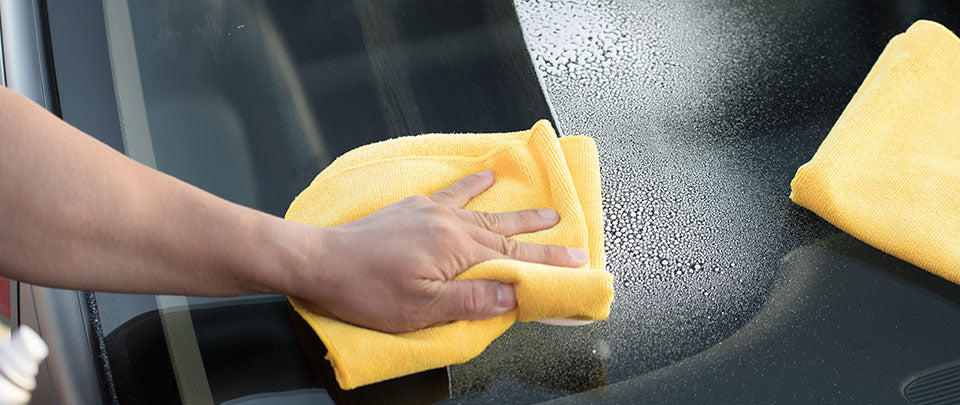
Exterior Glass Care
Outer windows, surfaces and glass parts of the hot rod you’re cleaning deserve the same care afforded the interior glass. Avoid ammonia-based cleaners. Seek out lint-free applicators and towels, and rotate them often to avoid streaking. Spray cleaner on the applicator, or directly on the glass. Don’t over apply – keep it neat.
- When it comes to glass care, it’s best to use an ammonia-free automotive cleaner. They’re mild, effective and safe for all aftermarket tints.
- Trim that butts up against your car’s glass surfaces – such as rubber, vinyl and metal – deserve the same caution given to parts adjacent to the interior glass. These exterior surfaces must be kept fresh with products intended specifically for them, like Chrome Polish, All-Chrome® Quick Polish, Back-to-Black® products, and Protectant vinyl care.
Mothers® makes two glass cleaners specially formulated for automotive application. Mothers Speed® Glass & Screen and Revision® Glass + Surface. They’re ammonia-free and won’t harm delicate trim or exterior surfaces. Use it with a 100%-cotton or microfiber cloth, or go old-fashioned and use wadded newsprint. Dig the video that Mothers® put together to help. It’s located here on their YouTube Channel.
In the case of water spotting on exterior glass surfaces such as the windshield or mirror glass, you can mend it with Mothers® Water Spot Remover or Chrome Polish. Mothers® built a dynamic ad for Water Spot Remover, seen here. Both contain exceptionally fine polishing compounds that will reduce and/or eliminate the irritating little white cruds that appear around the edges of water spotting, and the marks that develop over time due to wiper patterns. As with any fine polish, repeated applications will probably prove necessary – glass is hard, and requires regular care to maintain its transparency. Also, steer clear of rubber trim when using a compound. The polish can get stuck in the pores of the rubber, giving the trim a whitish look. You can avoid this problem by pre-soaking the trim with vinyl dressing – so the polish doesn’t stick. You can also use painter’s tape to cover and protect the trim’s surface. For more thoughts on glass care, click here and take a minute or three with this Mothers® video.
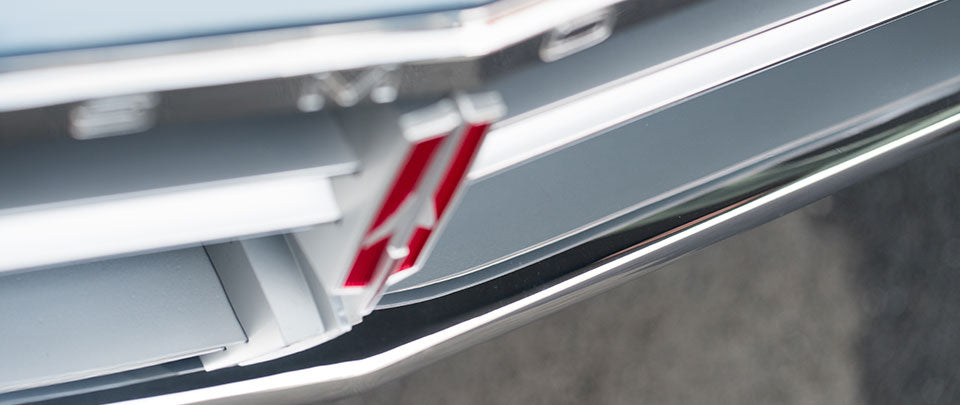
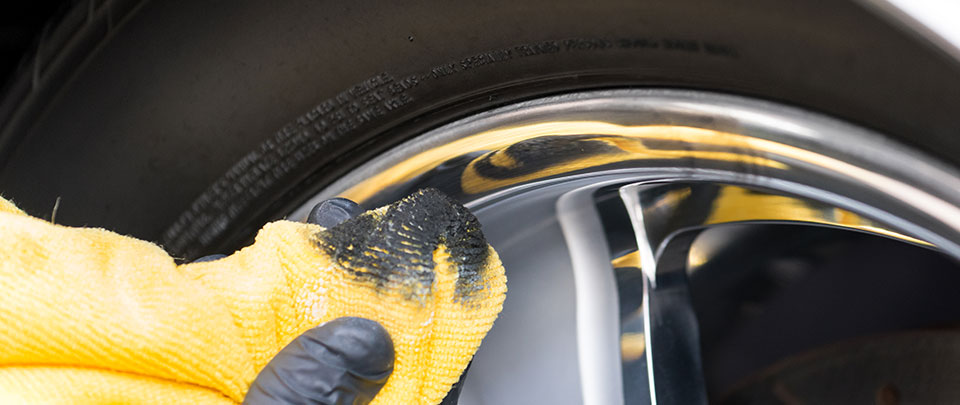
Chrome and Metal Trim
Take a look at the most subtle sled, rat-rod or new car and you’ll still find chrome and aluminum all over: exhaust tips, bumpers, emblems, mirrors, wheels, headlight bezels, under the hood and everywhere else. There’s always been a lot of shiny metal and chrome on cars, so it’s handy to have the right polishes in your car care arsenal.
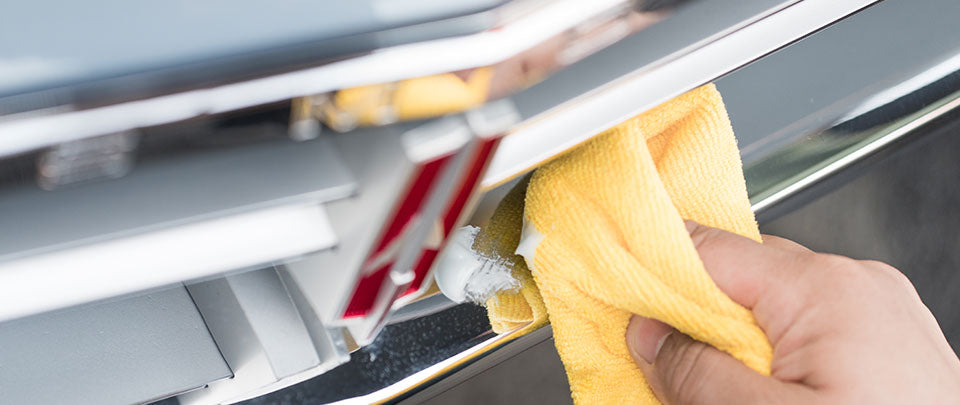
Cleaning and Polishing Chrome
It’s important to know what sort of metal you’re dealing with when working on metal surfaces and products, especially thin trim parts. Certain cleaners and polishes will maul the surfaces of incongruent varieties of metal – chrome is quite durable, for example, and some chrome cleaners can be powerful stuff. Use an applicator when working on small or narrow trim parts in order to avoid over-application. Be careful with any other surfaces you expose to a chrome cleaner, because rubber, paint and aluminum can suffer some damage from these products. Chrome cleaners are effective on all chrome, including bumpers and pipes (in addition to chrome trim). Make sure you’re working on a cool surface.
Beyond cleaning your chrome bits, a light treatment of a chrome-specific polish will take the metal where it needs to go – pay a little attention here to this how-to video, if you like. Once again, careful application must be the plan when working these smallish parts, as there are an awful lot of rubber, painted and plastic parts near chrome trim and bumpers, and a misapplication of chrome polish could stain them. Use a chrome polish that’s strong enough to clean quickly, but gentle enough not to harm neighboring parts – Mothers® Chrome Polish or All-Chrome® Quick Polish fit that bill. Its industry-standard formulation is strong enough to be effective, but mild enough that you can use it without damaging nearby parts or turning your fingers green (ain’t nobody got time for that).
DETAIL TIP
Polishing Chrome + Protecting Chrome
In addition to giving chrome a crisp sparkle, Mothers® Chrome Polish and All-Chrome® Quick Polish both leave behind a layer of polymers that resist smudges and fingerprints (and don’t put it away just yet – it also works great to restore transparency to uncoated glass surfaces).
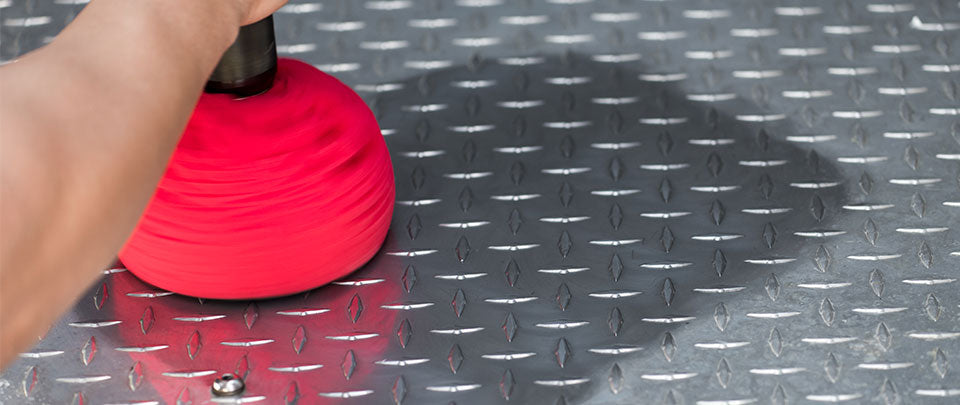
Polishing Aluminum & Diamond Plate
There are two ways to polish aluminum – one is by hand, the other is with a power tool. Each method has certain advantages. Polishing by hand takes longer, but it allows complete control of the process – especially when dealing with extremely intricate angles and hard-to-reach areas. Polishing with a power tool, like the Mothers® PowerBall II®, PowerBall® Mini or PowerCone® 360, is extremely efficient. You can polish large areas of aluminum to a brilliant shine in short order, and with surprisingly little effort. This makes a great deal of sense when covering sizable amounts of metal – like diamond plate, or deep-dish aluminum wheels. Extremely difficult areas to reach can prove to be a challenge. In these cases, a combination of both power tool and hand polishing are best.
Polishing by Hand
This process is easy and straight-forward. Start with a cool, clean surface. Consider using inexpensive, nitrile gloves to protect your skin and ensure easy clean up. As with wheel polishing, put a small amount of Mag & Aluminum Polish of a microfiber towel. Polish the metal in a back and forth motion. Keep the surface wet by adding more polish as needed. Avoid using circular motions, back and forth works best for aluminum.
With any metal polish, you’ll know it’s working when you rub the surface and a black residue is left on the towel. That residue acts as a secondary polish, so continue buffing when it appears. If there’s no black residue, you’re using the wrong polish on the wrong surface, so double back and check your specs (and clean off the area not turning black when polish is applied). Remove polish with a clean, dry microfiber towel. Do not allow the polish to dry. Click here and watch our Mothers® chemist explain the hand polishing process.
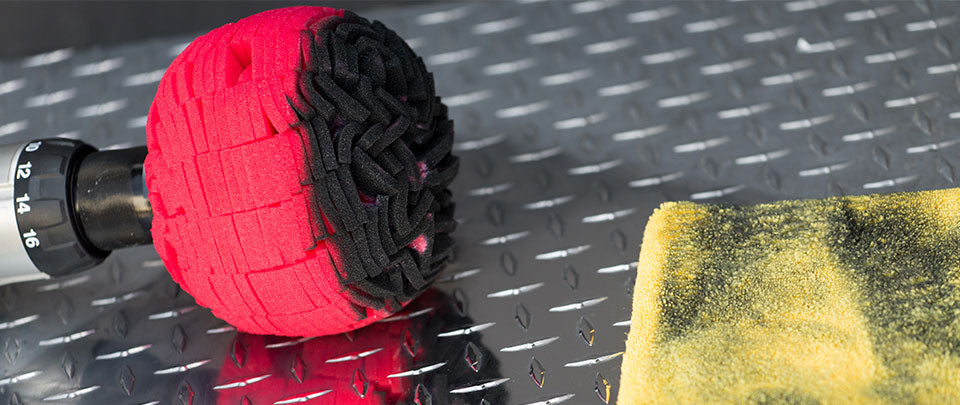
Polishing with a Power Tool
Start with a cool, clean surface. Proper eye protection is essential. As with hand polishing, it’s a good idea to use disposable nitrile gloves – they make clean up simple. Set your variable speed drill to clockwise rotation, and adjust the speed to low (between 300 and 400 rpm).
Spread an ample amount of polish on the tool, then place it against the metal. Start the drill, slowly at first to minimize sling. The polish should turn black. Move in all directions, overlapping your passes. Work a single, small section at a time, and make sure not to let the polish dry.
Remove the black residue with a soft microfiber towel, then continue until the entire piece of metal is finished.
For visual reference, check out our surprisingly elegant 2013 television ad for the previous generation PowerBall® and PowerCone® polishing tools.
×
![]()
×